Close
Page 1 of 3 123 LastLast
Results 1 to 10 of 27
  1. #1

    Default Micarta and G10 knife scales How to

    I thought I would throw up a how to thread on making Micarta and working with both Micarta and G10 knife scales

    Micarta is essentially "fiberglass" but instead of using actual fiberglass matting of mesh you use an alternative media, and pretty much anything will work. G10 is actually closer to "fiberglass" in that it does use a fiberglass mesh material with different colored resins.

    This first one is mine and was just something I wanted to mess around with. I took my daily folder and took the original wood scales off so I could make some new ones for it.

    The media I chose for this one was colored construction paper. I wanted something different and I think this hit the mark. I cut 2" strips of the paper.


    Regular old Parchment Paper seems to work the best and does not stick to anything!


    Work station, you need two flat surfaces which I will talk about more later, and your parchment paper, fiberglass resin a mixing bucket, rubber gloves a mixing cup and some mixing sticks a respirator and VERY GOOD ventilation.


    I wasnt able to get a lot of pics during the process as it is very messy and somewhat time sensitive and you have about 10-12 minutes of work time if you mix it per the instructions. Having said that and the fact that I have been working with fiberglass resins for over 20 years I know how to manipulate the resin to kick as slow or as fast as you like just by adjusting your amount of catalyst and heat. When making it I coat both sides of the first piece of material with resin, then lay the next piece on top of that and coat the top of each piece of media as I layer it up.


    As soon as you have it wrapped up tight you need to clamp it all up, and clamp it TIGHT AND EVEN. If you clamp it uneven you will end up with an uneven end product.


    It dries in about two hours if mixed per the product instructions but I let it sit over night.


    Start by tracing out your old scales (if you are copying old ones) or draw the shape of your end desire on the material. I then take an awl (or center punch) and scribe the lines that I want to follow. Scribing the lines almost ensures you dont lose your pencil lines when working up your final shapes.


    I built myself a little "sanding box'' so I could try and containg as much of the dust as possible. Be sure to wear a respirator or at minimum a dust mask and eye protection.


    Ok, then you need to start out by getting your initial rough cut done on the band saw.


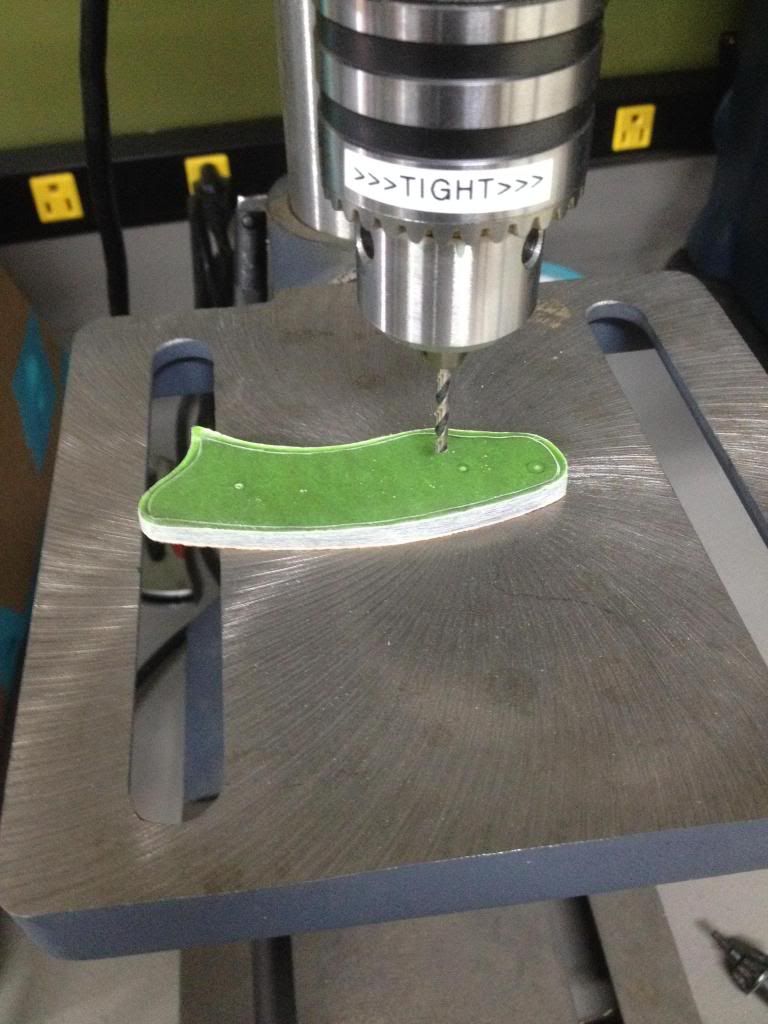
    Then mark your holes so you can drill them out. I take the old scales and clamp them to the new media and mark the center of the holes with a center punch.

    Certified NRA Instructor, ask me about CCW classes

    /l , [____],
    l----L -OlllllllO-
    ()_) ()_)------)_) Jeep ΜΟΛΩΝ ΛΑΒΕ

    My Feedback + 50 lost during the site crash

  2. #2

    Default

    Ok, time for mock up, I used tooth pick to temporarily hold the new scales on as I form them


    Ok, time to make these babies!

    I set it up on the drill press and and start with a coarse grit wheel.


    After a couple hours of forming I'm getting closer


    Then I clamped it into a small vice to hold it while I softened and formed it a little more by hand


    Its really starting to take shape with the 320 grit paper.


    Certified NRA Instructor, ask me about CCW classes

    /l , [____],
    l----L -OlllllllO-
    ()_) ()_)------)_) Jeep ΜΟΛΩΝ ΛΑΒΕ

    My Feedback + 50 lost during the site crash

  3. #3

    Default

    After many hours and lots of sanding its complete, my grit progression was 180, 220, 320, 400, 600, 800, 1000, 1500, 2000, 3000, and finished sanding with 6000 then wipe it down a couple of times with Mineral Oil (which is obviously food grade so perfectly safe) just to bring up the color a little bit.


    Certified NRA Instructor, ask me about CCW classes

    /l , [____],
    l----L -OlllllllO-
    ()_) ()_)------)_) Jeep ΜΟΛΩΝ ΛΑΒΕ

    My Feedback + 50 lost during the site crash

  4. #4

    Default

    Here are some more micarta projects I have in the works. In the first post you can see that I used wood for my compression materials but my preferred material is marble. Its strong, super easy to clean and doesnt flex when clamping it. I wipe it down with a coat of the same mineral oil to make it easier to release the finished project once dried and easier clean up for the next project.


    Here are the marble pieces


    Here I am gonna make some micarta scales out of some old denim jeans.


    Certified NRA Instructor, ask me about CCW classes

    /l , [____],
    l----L -OlllllllO-
    ()_) ()_)------)_) Jeep ΜΟΛΩΝ ΛΑΒΕ

    My Feedback + 50 lost during the site crash

  5. #5
    QUITTER Irving's Avatar
    Join Date
    Nov 2008
    Location
    Denver, CO
    Posts
    46,527
    Blog Entries
    1

    Default

    Hey that looks pretty good. Do you have to sand through the green to get to the purple?
    "There are no finger prints under water."

  6. #6
    GLOCK HOOKER hurley842002's Avatar
    Join Date
    May 2009
    Location
    Tucson, AZ
    Posts
    8,017

    Default

    Crazy you posted this, I was just looking at custom scales for the Zero Tolerance Knife I'm looking at. Too bad I don't have the tools or room to do this sort of thing at the moment. Great work Leif!

  7. #7

    Unhappy

    Alright G10. As I said earlier G10 is very similar to Micarta

    This particular one is for another board member and I will let him chime in on his own if he wants to.

    It really is the same process of finishing as the Micarta except G10 is a harder material and does have fiberglass mesh in it so you will get itchy when sanding and finishing it.

    You will note at the top of the G10 material sheet that it says "Remove the first layer on the other side of the sheet to expose the coarse texture" this initially had me a little confused until I really started looking at it and working with it. There are essentially two different sides of the sheet with two different textures, then there is a VERY THIN shiny layer to help keep it all together. When they say "remove" you cant just peel it off it needs to be sanded off, which is easy.


    Here is the knife we will be making new scales for


    Ok, gotta take the knife apart. Its good to take pics of any project as you are dissembling it so you can refer to the pics for reassembly if you have questions about how it goes back together.


    Alright lets get started

    Scribe your lines with an awl


    Certified NRA Instructor, ask me about CCW classes

    /l , [____],
    l----L -OlllllllO-
    ()_) ()_)------)_) Jeep ΜΟΛΩΝ ΛΑΒΕ

    My Feedback + 50 lost during the site crash

  8. #8

    Default

    Ok, I clamped to old scales to the new material so I could mark the holes that need to be drilled. This particular one has 4 different hols sizes and a countersunk bit will be used as well.


    All scribed and all holes drilled, no countersinking yet. I take a magic marker run it along my scribe marks so I can see them better on the lighter material.


    Time to mock it up now.


    I cleaned and organized all of the pieces before building it. I put an X across the holes that will NOT be used so as to not confuse me.


    Hey this things is starting to look like a knife


    I took the blade back off and wedged in some folded up paper so the end of the handles wouldnt flex during final sanding. You can also see all of the shotty chattering marks from when the knife was originally cut out of the spring steel blanks. I wanted to really capture this now, but dont worry I will clean that up too when finishing my final forming.


    Certified NRA Instructor, ask me about CCW classes

    /l , [____],
    l----L -OlllllllO-
    ()_) ()_)------)_) Jeep ΜΟΛΩΝ ΛΑΒΕ

    My Feedback + 50 lost during the site crash

  9. #9

    Default

    Alright on to the finishing


    After many hours with coarse gringing its starting to take shape while also cleaning up all those ugly chatter marks previously mentioned.


    Ok, now I have the shape just about complete I need to add the grooves in the G10 to match the steel handle. This must all be done by hand and it quite a tedious job.


    And now the other side


    And of coarse I think every man works better while eating corn nuts and drinking Gatorade.


    Alright, this is as far as I have gotten with this one so far. I am at about 6 hours total on this one now and have at least 3 more hours left for completion.

    I will add pics as it progresses.

    Thanks for looking.
    Certified NRA Instructor, ask me about CCW classes

    /l , [____],
    l----L -OlllllllO-
    ()_) ()_)------)_) Jeep ΜΟΛΩΝ ΛΑΒΕ

    My Feedback + 50 lost during the site crash

  10. #10

    Default

    Quote Originally Posted by Irving View Post
    Hey that looks pretty good. Do you have to sand through the green to get to the purple?
    Thanks Stu, yes, the more you sand the more layers you reveal.

    Quote Originally Posted by hurley842002 View Post
    Crazy you posted this, I was just looking at custom scales for the Zero Tolerance Knife I'm looking at. Too bad I don't have the tools or room to do this sort of thing at the moment. Great work Leif!
    Thanks Dan, let me know if you would like some help!
    Certified NRA Instructor, ask me about CCW classes

    /l , [____],
    l----L -OlllllllO-
    ()_) ()_)------)_) Jeep ΜΟΛΩΝ ΛΑΒΕ

    My Feedback + 50 lost during the site crash

Posting Permissions

  • You may not post new threads
  • You may not post replies
  • You may not post attachments
  • You may not edit your posts
  •